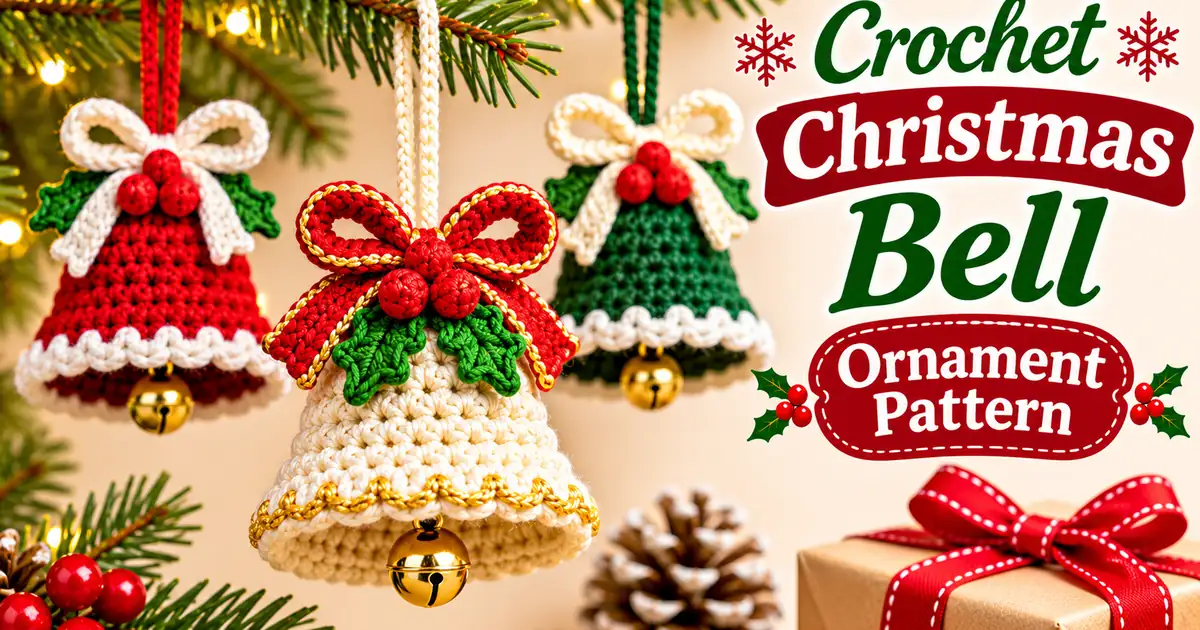
Add a festive handmade touch to your Christmas decorations with this Crochet Christmas Bell Ornament Pattern. This adorable little bell features a beautiful crocheted shape, a delicate white scalloped trim, and a pretty red bow. You can also add a tiny gold jingle bell inside to give it a traditional Christmas finish.
The bell is worked from the top down in simple crochet rounds, with increases creating its wider lower edge. Once the red or cream bell body is finished, you can add the decorative trim, make a hanging loop, and finish it with a small bow or holly details.
Whether you want to decorate your Christmas tree, create handmade gifts, or make a beautiful holiday garland, this step-by-step tutorial will guide you through making your own cute crochet bell ornament in your favorite festive colors.
This Crochet Christmas Bell Ornament Pattern is a lovely project for adding handmade charm to your holiday decorations. The little bell has a rounded shape, a decorative scalloped edge, and a festive bow that gives it a beautiful Christmas look.
The bell body is worked in continuous crochet rounds, starting with a small top and gradually increasing to create a wider lower edge. You can make it in traditional red, cream, or forest green yarn and finish it with white trim, a hanging loop, and an optional small jingle bell.
- Skill level: Confident beginner
- Yarn: Medium-weight yarn
- Hook: 3.5–4 mm crochet hook
- Main colors: Red, cream, or green
- Trim: White yarn
- Finished size: Approximately 3–3.5 inches tall, excluding the loop
- Construction: Crocheted bell body with separate trim and decorations
- Terms: US crochet terminology
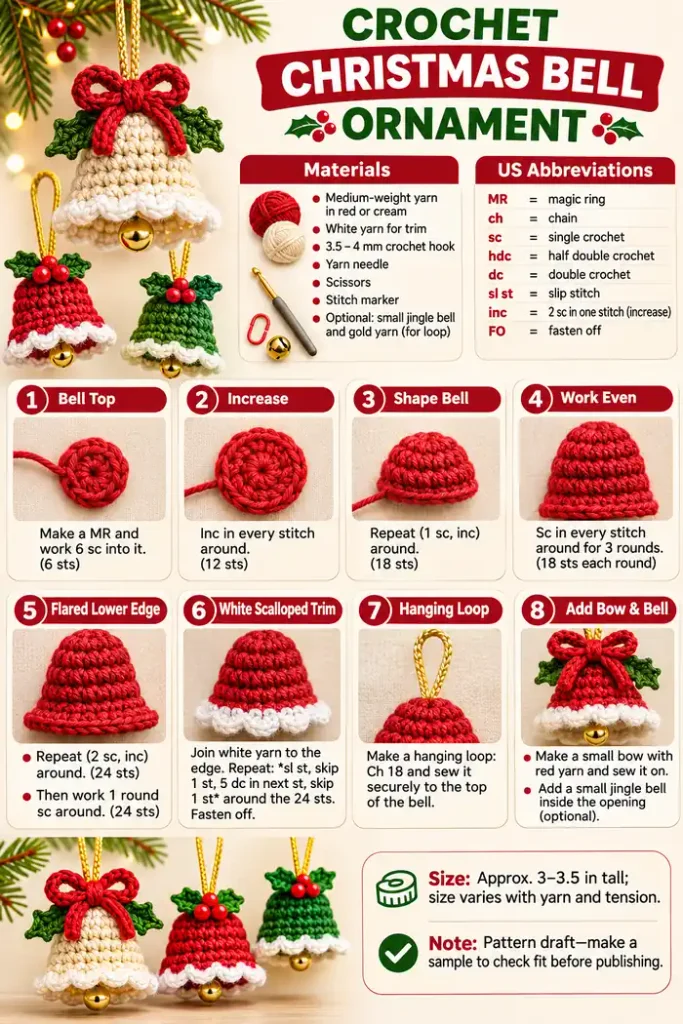
Materials You Will Need
Gather your supplies before starting. You can use leftover yarn for the small decorative details.
- Medium-weight yarn in red, cream, or green
- Small amount of white yarn for the scalloped trim
- Small amount of red yarn for a decorative bow
- 3.5–4 mm crochet hook
- Yarn needle
- Scissors
- Stitch marker
- Optional small gold jingle bell
- Optional gold yarn for the hanging loop
Abbreviations Used in This Pattern
This tutorial uses standard US crochet terminology.
| Abbreviation | Meaning |
|---|---|
| MR | Magic ring |
| ch | Chain |
| sc | Single crochet |
| dc | Double crochet |
| inc | Increase: 2 sc in the same stitch |
| sl st | Slip stitch |
| st / sts | Stitch / stitches |
| FO | Fasten off |
Finished Size
The finished bell measures approximately 3–3.5 inches tall, excluding the hanging loop. The exact size depends on your yarn, hook, and crochet tension.
Important Notes Before You Start
- The bell body is worked in continuous rounds.
- Do not join rounds unless the instructions specifically tell you to.
- Use a stitch marker to mark the first stitch of each round.
- Move the stitch marker as you complete each round.
- The lower edge is widened with an increase round.
- The white scalloped trim is added after the bell body is finished.
- The bell is left unstuffed so it keeps an open bell shape.
How to Crochet a Christmas Bell Ornament
Follow these steps to crochet the bell body, add the decorative trim, and finish your ornament with a hanging loop and festive details.
Step 1: Make the Top of the Bell
With your chosen bell color, make a magic ring. This forms the small closed top of the bell.
- Round 1: Work 6 sc into the MR. (6 sts)
Pull the magic ring closed. Place a stitch marker in the first stitch to help you follow the continuous rounds.
Step 2: Increase the Bell Shape
Continue increasing to make the bell wider as you work downward.
- Round 2: Inc in every stitch around. (12 sts)
- Round 3: Repeat (1 sc, inc) around. (18 sts)
Your work should now look like a small rounded cup beginning to form.
Step 3: Shape the Bell Body
Work the next rounds without increasing to build the upper body of the bell.
- Rounds 4–6: Sc in every stitch around. (18 sts per round)
Keep your stitches even. The bell should begin to look like a small cup with a narrow top.
Step 4: Create the Flared Lower Edge
Now widen the lower edge to give the bell its recognizable flared shape.
- Round 7: Repeat (2 sc, inc) around. (24 sts)
- Round 8: Sc in every stitch around. (24 sts)
Fasten off and weave in the yarn end. Your bell body should now have a narrow top and a wider open bottom.
Step 5: Add the White Scalloped Trim
Join white yarn to the lower edge of the bell. The scalloped border creates a pretty decorative finish.
Repeat the following sequence around the 24 stitches:
- Sl st in the next stitch.
- Skip the next stitch.
- Work 5 dc into the following stitch to make one shell.
- Skip the next stitch.
Repeat this sequence six times to make six scallops around the edge. Join with a slip stitch to the first stitch and fasten off.
Arrange the shells evenly with your fingers so the trim looks neat.
Step 6: Make the Hanging Loop
Use gold yarn or the same color as the bell to create a loop.
- Ch 18, or adjust the length to your preference.
- Join the ends with a slip stitch to form a loop.
- Fasten off, leaving a long tail.
- Sew the loop securely to the top center of the bell.
Make sure the loop is firmly attached before hanging your ornament.
Step 7: Add a Decorative Bow
A small red bow gives the bell a classic Christmas look.
- With red yarn, ch 16.
- Work 1 dc in the third chain from the hook and in each remaining chain.
- Fasten off, leaving a long tail.
- Fold the strip into two loops, bringing the ends toward the center.
- Wrap a short piece of yarn around the center several times.
- Tie securely at the back and sew the bow to the front of the bell.
Adjust the loops gently so both sides look even.
Step 8: Add the Final Christmas Details
You can finish your bell with a few optional decorations.
- Sew a small gold jingle bell inside the open bottom, making sure it is secure.
- Add two small green holly leaves beside the bow if desired.
- Weave in all remaining yarn ends.
- Check the scalloped trim and hanging loop.
- Shape the bell gently with your fingers.
Your handmade crochet Christmas bell ornament is ready to display.
Helpful Tips for a Beautiful Crochet Bell
- Use firm, even stitches to help the bell hold its shape.
- Count stitches after each increase round.
- Keep the lower edge open and flared.
- Make the scalloped shells evenly spaced around the edge.
- Choose a lightweight bow so it does not pull the bell forward.
- Secure any optional jingle bell carefully.
Frequently Asked Questions
Can I make this crochet bell in different colors?
Yes. Red, cream, and forest green are lovely Christmas choices. You can also use gold or silver yarn for a festive variation.
Can I make the bell larger?
Yes. Use thicker yarn and a larger hook, or add another increase round before working the straight rounds. If you change the stitch count, adjust the scalloped trim so the shells fit evenly around the edge.
Do I need to stuff the crochet bell?
No. The bell is designed to remain open and hollow. Leaving it unstuffed helps it keep its bell-like shape.
Can I add a real jingle bell inside?
Yes. You can sew a small jingle bell securely inside the lower opening. Make sure it is firmly attached and suitable for your intended display.
Can I use a different trim instead of scallops?
Yes. You can use a simple white single crochet border or a row of slip stitches if you prefer a cleaner look.
Can I use this bell as a gift topper?
Absolutely. Attach it to a ribbon or gift tag, or tie it around a wrapped present for a handmade Christmas detail.
How should I store my crochet bell ornaments?
Keep them in a clean, dry box. Avoid placing heavy items on top so the scalloped trim and decorative bows keep their shape.
Final Thoughts
This Crochet Christmas Bell Ornament Pattern is a lovely way to add handmade charm to your holiday decorations. With its flared shape, white scalloped trim, festive bow, and optional jingle bell, it makes a beautiful addition to a Christmas tree or handmade gift.
Try making bells in red, cream, and forest green to create a matching ornament collection. You can also experiment with different bows, trims, and hanging loops to make every bell unique.
Enjoy your Christmas crochet and have fun making these sweet handmade bell ornaments!