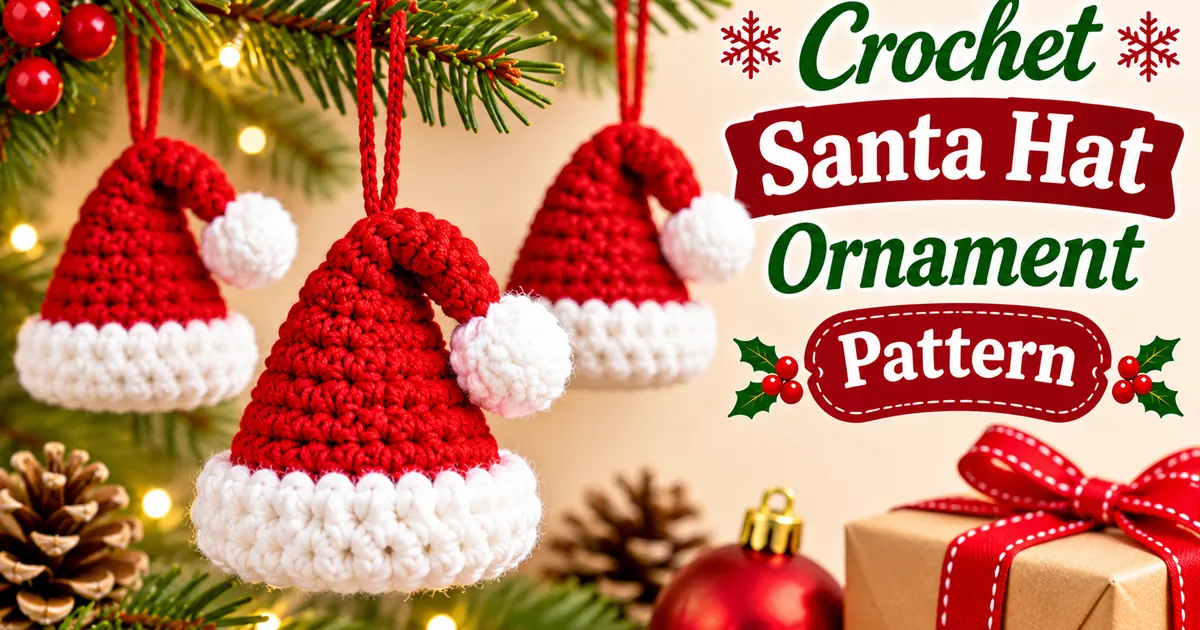
Add a cheerful handmade touch to your holiday decorations with this Crochet Santa Hat Ornament Pattern. This adorable little hat features a bright red crocheted body, a soft white brim, and a fluffy pom-pom at the tip. It makes a lovely decoration for your Christmas tree, holiday gifts, or festive garlands.
The mini Santa hat is worked from the tip downward in simple crochet rounds. You will shape the red cone, add the white brim, make a tiny pom-pom, and finish with a hanging loop. Classic red and white yarn gives it a traditional Christmas look, but you can also experiment with different colors.
Whether you are making ornaments for your own home or creating small handmade gifts for family and friends, this step-by-step tutorial will guide you through each part of the project and help you finish a cute little Santa hat for the holiday season.
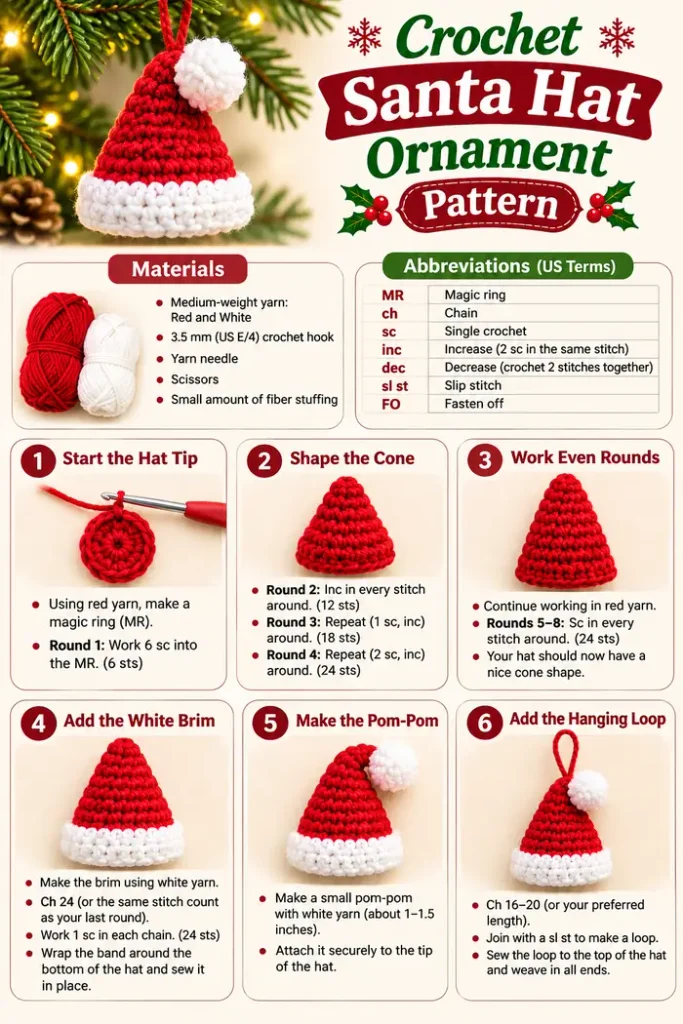
This Crochet Santa Hat Ornament Pattern is a fun little project for the Christmas season. It creates a miniature red Santa hat with a fluffy white brim and a cute pom-pom at the tip. The finished ornament looks adorable hanging from a Christmas tree branch or attached to a wrapped holiday gift.
The hat is crocheted from the top down in continuous rounds. You will begin with a small magic ring, increase the stitches to form the cone, and continue with even rounds before adding the white brim and pom-pom. A simple hanging loop completes the design.
- Skill level: Confident beginner
- Yarn: Medium-weight yarn
- Hook: 3.5 mm or 4 mm crochet hook
- Colors: Red and white
- Finished size: Approximately 3.5–4 inches tall, excluding the loop
- Construction: Crocheted cone with separate brim and pom-pom
- Terms: US crochet terminology
Materials You Will Need
Gather your supplies before beginning. This small ornament is a great project for using leftover yarn from other Christmas crochet projects.
- Medium-weight red yarn for the hat
- Medium-weight white yarn for the brim and pom-pom
- 3.5 mm or 4 mm crochet hook
- Small amount of fiber filling for the pom-pom, if desired
- Yarn needle
- Scissors
- Stitch marker
- Optional gold or red yarn for the hanging loop
Abbreviations Used in This Pattern
This tutorial uses standard US crochet terminology.
| Abbreviation | Meaning |
|---|---|
| MR | Magic ring |
| ch | Chain |
| sc | Single crochet |
| inc | Increase: 2 sc in the same stitch |
| dec | Decrease: crochet 2 stitches together |
| sl st | Slip stitch |
| st / sts | Stitch / stitches |
| FO | Fasten off |
Finished Size
The finished mini Santa hat measures approximately 3.5–4 inches tall, excluding the hanging loop. The final size depends on your yarn weight, hook size, and crochet tension.
Important Notes Before You Start
- The red hat body is worked in continuous rounds. Do not join at the end of each round.
- Use a stitch marker to identify the first stitch of each round.
- Move the marker up as you complete each round.
- Ch 1 is not needed when working continuous single crochet rounds.
- The white brim is added after the red cone is complete.
- Keep your stitches even so the cone looks neat.
How to Crochet a Mini Santa Hat Ornament
Follow these steps to make the red hat body, white brim, pom-pom, and hanging loop.
Step 1: Start the Santa Hat Tip
With red yarn, make a magic ring. This forms the small pointed top of your Santa hat.
- Round 1: Work 6 sc into the MR. (6 sts)
Pull the magic ring closed. Place a stitch marker in the first stitch so you can follow the continuous rounds.
Step 2: Shape the Red Cone
Continue increasing to make the hat wider as you work toward the bottom.
- Round 2: Inc in every stitch around. (12 sts)
- Round 3: Repeat (1 sc, inc) around. (18 sts)
- Round 4: Repeat (2 sc, inc) around. (24 sts)
Your work should now look like a small cone. Keep the increases evenly spaced to maintain a smooth shape.
Step 3: Work the Straight Hat Body
Once the cone reaches 24 stitches, continue without increasing to create the main red section.
- Rounds 5–8: Sc in every stitch around. (24 sts per round)
The hat should now have a pointed top and a wider lower opening. If you want a taller hat, add one or two more even rounds before making the brim.
Step 4: Add the White Brim
Join white yarn to the bottom opening of the red hat. Work around the edge to create a soft-looking brim.
- Brim Round 1: Work 1 sc in each stitch around. (24 sts)
- Brim Round 2: Work 1 sc in each stitch around. (24 sts)
Fasten off and weave in the loose end. For a folded look, you can add one more white round and gently turn the brim upward.
Step 5: Make the White Pom-Pom
A small white pom-pom gives the Santa hat its classic festive finish. You can crochet a tiny ball or use a small ready-made pom-pom.
Mini crochet pom-pom:
- With white yarn, make a magic ring.
- Round 1: Work 6 sc into the ring. (6 sts)
- Round 2: Inc in every stitch around. (12 sts)
- Round 3: Sc in every stitch around. (12 sts)
- Round 4: Repeat (1 sc, dec) around. (8 sts)
Add a tiny amount of fiber filling. Fasten off, leaving a long tail. Use the tail to close the opening and sew the pom-pom securely to the tip of the hat.
Step 6: Make the Hanging Loop
Use red, white, or gold yarn to create a loop for hanging the ornament.
- Ch 16–20, depending on your preferred loop length.
- Join the chain ends with a slip stitch to form a loop.
- Fasten off, leaving a long sewing tail.
- Sew the loop securely to the top of the hat, close to the pom-pom.
Check that the loop is firmly attached before hanging your ornament.
Step 7: Finish and Shape Your Santa Hat
Your crochet Santa hat ornament is almost ready. Take a moment to check the finishing details.
- Weave in all loose yarn ends.
- Shape the red cone gently with your fingers.
- Adjust the white brim so it sits evenly around the bottom.
- Check that the pom-pom is securely attached.
- Make sure the hanging loop is strong and firmly sewn.
Your mini Santa hat is now ready to hang on your Christmas tree or use as a handmade gift decoration.
Helpful Tips for a Beautiful Santa Hat
- Use firm, even stitches to help the cone keep its shape.
- Count your stitches after every increase round.
- Use soft white yarn for a fluffy-looking brim and pom-pom.
- Keep the pom-pom small so it does not pull the hat out of shape.
- Add extra straight rounds if you want a taller Santa hat.
- Make several hats in different sizes for a matching ornament set.
Frequently Asked Questions
Can I make this Santa hat ornament smaller?
Yes. Use a lighter yarn and a smaller crochet hook. You can also stop after fewer straight rounds to make a shorter hat.
Can I make the hat in different colors?
Absolutely. You can use green, cream, or even pink yarn for a playful holiday version. Keep the white brim and pom-pom for a traditional Santa-inspired finish.
Can I use a ready-made pom-pom?
Yes. A small ready-made white pom-pom is a convenient alternative. Sew it firmly to the tip of the hat.
Can I use this mini Santa hat as a gift topper?
Yes. Attach it to a ribbon or gift tag, or place it on top of a wrapped present for a cute handmade Christmas detail.
How do I make the white brim look fluffy?
Choose a soft or fluffy white yarn. You can also use a slightly textured yarn for the brim and pom-pom while keeping the red body in smooth yarn.
How should I store my crochet Santa hat ornaments?
Store them in a clean, dry box. Avoid pressing the pom-poms and brims under heavy decorations so they keep their shape.
Final Thoughts
This Crochet Santa Hat Ornament Pattern is a sweet and simple way to add handmade charm to your Christmas decorations. The bright red cone, soft white brim, and tiny pom-pom create a classic Santa-inspired look that is perfect for the holiday season.
Make a few mini hats for your Christmas tree, use them as gift toppers, or create a matching set for family and friends. You can change the colors, adjust the height, and add little details to make every ornament unique.
Enjoy your Christmas crochet and have fun making these adorable handmade Santa hat decorations!