
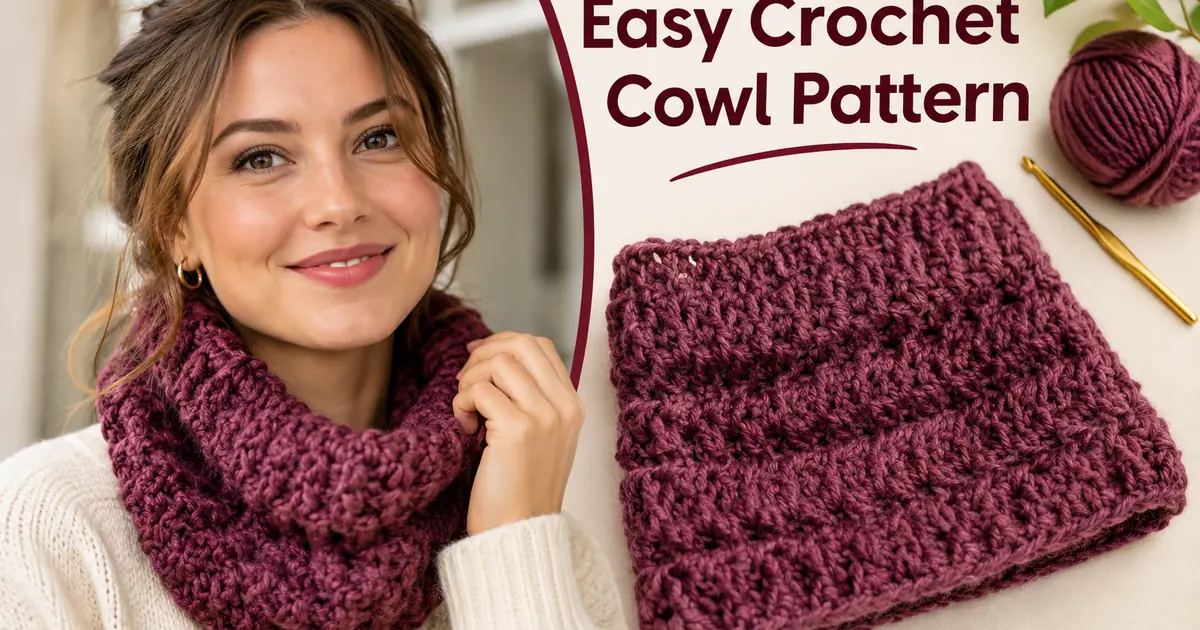
When the temperature starts dropping, cozy handmade accessories become some of the nicest things to add to your winter wardrobe. A soft crochet cowl is a simple way to keep your neck warm while adding a beautiful handmade touch to your everyday outfits. If you love working with yarn or want to try a new creative hobby, this Easy Crochet Cowl Pattern is a wonderful project to start with.
Unlike a traditional scarf, a crochet cowl is designed as a continuous loop that sits comfortably around your neck. It is easy to wear, does not have long loose ends, and can be styled with sweaters, coats, jackets, and other cold-weather outfits. You can make it in a classic neutral shade or choose a rich seasonal color that makes your winter look more interesting.
The best part about this Easy Crochet Cowl Pattern is its simple construction. You will create a rectangular piece using basic half double crochet stitches and then join the two short edges to form a circular cowl. There is no complicated shaping, difficult stitch combination, or advanced technique to learn.
Even if you are still developing your crochet skills, you can follow this tutorial step by step. We will cover the materials, yarn requirements, crochet hook size, stitch abbreviations, gauge, measurements, and complete instructions so you know what to do before picking up your hook.
- A beginner-friendly construction method.
- Uses basic chain and half double crochet stitches.
- Requires only a few everyday crochet supplies.
- Easy to customize with different colors and yarn types.
- A cozy handmade accessory for the colder months.
- A lovely handmade gift idea for friends and family.
Whether you want to make your first wearable crochet project or simply need a quick winter accessory, this pattern gives you a practical and enjoyable way to create something beautiful. Gather your favorite yarn, prepare your crochet hook, and follow along to make a cozy cowl of your own.
What Is a Crochet Cowl?
A crochet cowl is a circular or tube-shaped accessory made with yarn and a crochet hook. It is designed to sit around the neck and provide warmth without the loose ends of a traditional scarf. Depending on its length and width, you can wear it close to your neck or fold it for a thicker layered appearance.
Crochet cowls are popular because they are practical, comfortable, and easy to customize. You can make them using simple stitches, textured patterns, or different yarn weights. Some designs are lightweight enough for everyday wear, while others are thick and cozy for particularly cold weather.
For this project, we will make a rectangular crochet piece using half double crochet stitches. After reaching the desired height, the two short edges will be joined to create a comfortable circular shape.
- Start with a foundation chain to create the cowl circumference.
- Work half double crochet stitches across each row.
- Continue until the fabric reaches your preferred height.
- Join the two short edges to create a circular tube.
- Weave in loose yarn ends and check the finished fit.
Is This Easy Crochet Cowl Pattern Suitable for Beginners?
Yes! This design is suitable for beginners who have learned a few basic crochet techniques. You do not need advanced experience, complicated stitch combinations, or special equipment to complete it.
The main stitch used throughout the project is half double crochet. Once you understand how to make this stitch, you will repeat the same movement across the rows. This makes the pattern easier to follow than projects that require several different stitches or complicated shaping.
Basic Crochet Skills You Should Know
- Slip knot: The starting loop placed on your crochet hook.
- Chain stitch: The basic stitch used to create the foundation chain.
- Yarn over: Wrapping the yarn around your crochet hook.
- Half double crochet: A basic stitch that creates a soft, slightly textured fabric.
- Slip stitch: A stitch used for joining or moving through stitches.
- Weaving in ends: Hiding loose yarn tails to give your project a neat finish.
Materials Needed for the Easy Crochet Cowl Pattern
Before starting your project, collect all the supplies you need. This design does not require an expensive collection of crochet tools. A suitable yarn, a crochet hook, and a few simple accessories are enough to create a lovely winter cowl.
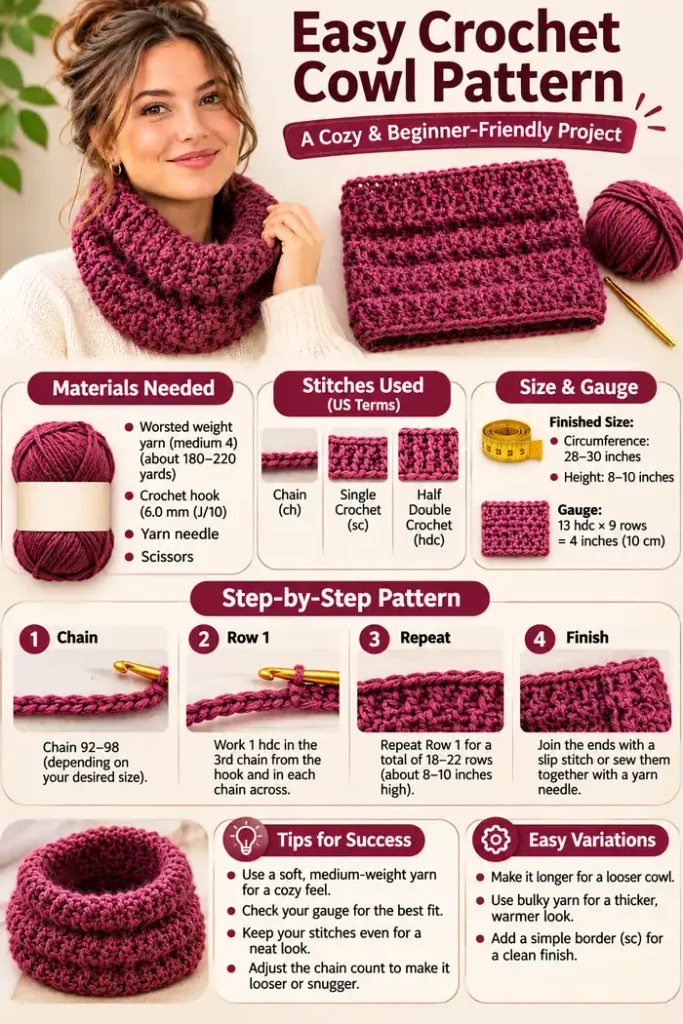
Approximately 180–220 yards of medium-weight category 4 yarn, depending on your tension and finished measurements.
A 6.0 mm crochet hook (US J/10) is the starting size for this sample pattern.
Useful for sewing the two edges together and hiding loose yarn ends.
A small, sharp pair of scissors for cutting the yarn neatly.
Helps you measure the circumference, height, and gauge of your crochet fabric.
Optional tools that can help mark stitches and keep track of important points.
Choosing the Right Yarn
Yarn choice can make a big difference in the appearance and comfort of your finished cowl. For this pattern, medium-weight worsted yarn is a suitable starting point. It creates a fabric that is warm enough for winter without becoming unnecessarily heavy.
Choose a soft yarn that feels comfortable against your neck. Since the cowl will sit close to your skin, avoid materials that feel scratchy or irritating. You should also consider how easy the yarn is to wash and maintain.
Popular Yarn Options
- Acrylic yarn: An affordable and widely available option. It comes in many colors and is generally easy to care for.
- Merino wool: A soft, warm choice that creates a luxurious feel.
- Wool blends: These combine wool with other fibers to provide different levels of warmth, softness, and durability.
- Cotton blends: These can create a lighter fabric, although they may not provide as much warmth as wool-based yarn.
Selecting the Correct Crochet Hook
This sample pattern uses a 6.0 mm crochet hook. However, the correct hook size depends on your chosen yarn and personal tension. A larger hook usually creates looser stitches, while a smaller hook generally produces a tighter fabric.
If your crochet fabric feels stiff, try a slightly larger hook. If the stitches look too loose and have large gaps, consider a smaller hook. Always make a gauge swatch before beginning the full project.
Other Helpful Supplies
A yarn needle is especially useful when finishing your cowl. It allows you to hide loose yarn ends and create a neat join. A measuring tape helps you check the dimensions as you work, while stitch markers can make it easier to identify the beginning and end of a row.
Finished Size and Gauge
Before beginning the main pattern, it is helpful to understand the finished dimensions. Gauge tells you how many stitches and rows fit into a specific measurement. It helps you achieve a similar size even if your crochet tension is different from someone else’s.
Sample Finished Measurements
- Circumference: Approximately 28–30 inches.
- Height: Approximately 8–10 inches.
- Shape: Circular tube.
- Construction: Worked flat in rows and joined at the short edges.
- Skill level: Beginner.
- Main stitch: Half double crochet.
Gauge Information
The sample gauge for this design is approximately 13 half double crochet stitches and 9 rows in a 4-inch square. Your results may vary depending on the yarn, hook size, and tension you use.
- 13 half double crochet stitches = 4 inches.
- 9 rows = 4 inches.
- Approximately 3.25 stitches per inch.
- Approximately 2.25 rows per inch.
How to Make a Gauge Swatch
- Choose your yarn and crochet hook.
- Make a foundation chain wide enough for a sample larger than 4 inches.
- Work half double crochet rows until your sample is taller than 4 inches.
- Lay the fabric flat without stretching it.
- Measure a 4-inch section in the center.
- Count the stitches and rows within that section.
If you have more stitches than the target gauge, your stitches may be too tight. Try a larger hook. If you have fewer stitches, your stitches may be too loose, so consider using a smaller hook.
Abbreviations Used in This Crochet Pattern
This tutorial follows standard US crochet terminology. If you are using a crochet guide from another country, remember that US and UK stitch names can sometimes differ.
| Abbreviation | Meaning | Use |
|---|---|---|
| ch | Chain | Make a chain stitch. |
| hdc | Half Double Crochet | Work a half double crochet stitch. |
| sl st | Slip Stitch | Join or move through stitches. |
| st | Stitch | Refers to one stitch. |
| sts | Stitches | Refers to multiple stitches. |
| yo | Yarn Over | Wrap yarn around the hook. |
| rep | Repeat | Work the same instructions again. |
Easy Crochet Cowl Pattern: Step-by-Step Instructions
Now it is time to start crocheting! Follow each step carefully and take your time, especially if you are still learning. This project is worked flat in rows, which means you will turn your work at the end of each row.
Quick Pattern Overview
- Yarn: Medium-weight worsted yarn.
- Yarn quantity: Approximately 180–220 yards.
- Hook: 6.0 mm (J/10), adjusted according to gauge.
- Foundation chain: Approximately 92–98 chains as a starting estimate.
- Main stitch: Half double crochet.
- Rows: Approximately 18–22, depending on your desired height and gauge.
- Finishing: Join the two short edges.
Step 1: Make a Slip Knot
Begin by making a slip knot with your yarn. Place the loop on your crochet hook and gently tighten it. The loop should fit comfortably around the hook without being too tight.
Keep the working yarn positioned so that you can move it smoothly as you crochet. Leave a short yarn tail that can be woven into the finished project later.
Create a comfortable slip knot and place it on your 6.0 mm crochet hook. Check that the loop can move easily along the hook.
Step 2: Create the Foundation Chain
Make approximately 92–98 chain stitches as a starting estimate for a circumference close to 28–30 inches with the sample gauge. Your exact chain count should be based on your measured gauge and preferred fit.
To make a chain stitch, wrap the yarn over the hook and pull it through the loop already on your hook. Repeat this movement until you reach the required number of chains.
Try to keep your chain stitches even. If they are extremely tight, the bottom edge may become narrower than the rest of your cowl. If you find it difficult to insert your hook into the chains, relax your tension or try a slightly larger hook for the foundation chain.
Step 3: Work the First Half Double Crochet Row
Yarn over your hook. Insert the hook into the third chain from the hook. Yarn over again and pull the yarn through the chain. You should now have three loops on your hook.
Yarn over once more and pull through all three loops. You have completed your first half double crochet stitch.
Continue making one half double crochet in each remaining chain across the row. Keep your stitches at a similar height and tension so the fabric looks even.
- Yarn over your hook.
- Insert the hook into the third chain from the hook.
- Yarn over and pull through the chain.
- Yarn over again and pull through all three loops.
- Repeat across the foundation chain.
You should have approximately two fewer half double crochet stitches than your original chain count because the first two chains are skipped.
Step 4: Turn Your Work and Begin Row 2
After completing the first row, make two chain stitches. These chains act as your turning chain and help bring the yarn to the correct height for the next row. For this pattern, the turning chains do not count as a separate stitch.
Turn your work. Make one half double crochet in the first stitch and continue across the row. Try not to skip the first stitch, as doing so can gradually make your cowl narrower.
Continue working one half double crochet in each stitch until you reach the end of the row. Your stitch count should remain consistent from row to row.
- Chain 2 at the end of the previous row.
- Turn your work.
- Work one half double crochet in the first stitch.
- Continue with one half double crochet in every stitch across.
- Repeat the same process for each new row.
Step 5: Continue Until You Reach the Desired Height
Repeat the second-row instructions until your crochet piece reaches approximately 8–10 inches in height. With the sample gauge, this may take around 18–22 rows in total, including the first row.
Do not worry if your row count is slightly different. Some crocheters naturally make taller or shorter stitches. The most important thing is to measure the fabric and stop when it reaches your preferred height.
For a shorter cowl, stop closer to 8 inches. If you want a fuller appearance that can be folded over, work toward 10 inches or slightly more.
- Keep the side edges as straight as possible.
- Count your stitches occasionally.
- Measure the height after every few rows.
- Check that the fabric is not becoming too tight or too loose.
Step 6: Finish the Final Row
Once your piece reaches the desired height, complete your final half double crochet row. Cut the yarn, leaving a tail long enough for joining and finishing.
Pull the yarn tail through the final loop on your hook and gently tighten it. Avoid pulling so hard that the final stitch becomes distorted.
Step 7: Join the Two Short Edges
Lay your crochet rectangle flat. Bring the two short edges together so the piece forms a circular tube. Before joining, check that the fabric is not twisted.
You can use a yarn needle to sew the edges together with a mattress stitch or another neat sewing method. Alternatively, use slip stitches if you prefer a crochet join.
Work carefully along the entire edge, keeping the joining stitches even. A neat seam will help your finished cowl look clean and comfortable.
- Place the two short edges together.
- Check that the fabric is not twisted.
- Join the edges using a yarn needle or slip stitches.
- Secure the yarn at the end.
- Weave in all loose yarn tails.
Step 8: Weave in the Loose Ends
Use your yarn needle to weave the remaining yarn tails into the stitches on the wrong side of your cowl. Move the needle through several stitches and change direction once or twice to help secure the yarn.
Trim the extra yarn carefully without cutting into the finished fabric. Check the seam and the rest of the cowl for loose loops or unfinished areas.
Step 9: Shape and Inspect Your Finished Cowl
Lay your finished cowl flat and gently arrange the fabric. Check the circumference, height, and seam. Make sure the opening is comfortable and the fabric sits nicely around the neck.
If your yarn label allows it, you can gently block the cowl to improve its shape. Always follow the care instructions for your chosen yarn before applying water or heat.
You now have a cozy, simple crochet accessory that you can wear throughout the colder months. The same basic construction can also be used to create different sizes and color combinations.
How to Customize Your Crochet Cowl
One of the nicest things about making your own accessories is that you can change the design to suit your style. Once you understand the basic construction, it becomes easy to experiment with different yarns, colors, textures, and dimensions.
1. Make a Shorter Cowl
If you prefer a closer fit around your neck, reduce the length of your foundation chain. The starting chain determines the circumference in this flat construction. Measure it before beginning the first row.
A shorter cowl can sit comfortably around your neck without creating too much extra fabric. It is a good option if you want a simple accessory to wear under a winter coat.
2. Make a Longer and Looser Cowl
For a relaxed fit, increase the foundation chain until it reaches your desired circumference. A longer cowl can be worn loosely or folded for a layered appearance.
Remember that adding stitches will increase the amount of yarn needed. Keep an eye on your measurements so you can estimate your yarn requirements before starting.
3. Adjust the Height
The height of your cowl depends on the number of rows you crochet. Work fewer rows for a simple neck warmer or add more rows for a taller design that can be folded over.
For a fuller winter accessory, a height of 10–12 inches may be a nice option. Check the fit around your neck before completing the final row.
4. Try Different Yarn Colors
Color can completely change the appearance of a handmade crochet cowl. Neutral shades such as cream, beige, taupe, and gray are easy to pair with everyday outfits.
If you prefer a more noticeable accessory, try burgundy, forest green, chocolate brown, or deep plum. These shades can add a beautiful seasonal touch to your winter wardrobe.
5. Add a Simple Border
If you want a more finished appearance, you can add a simple single crochet border along the top and bottom edges before joining the piece. This is optional and can help create a neat edge.
Work one single crochet stitch into each suitable edge stitch or row-end space. Adjust the number of stitches as needed to keep the border flat instead of pulling the fabric inward.
Best Colors for a Handmade Winter Cowl
Choosing a color is one of the most enjoyable parts of a crochet project. A beautiful shade can make even a simple stitch pattern look stylish and special.
If you are making this cowl for everyday use, consider choosing a color that works with several pieces in your wardrobe. If you are creating a gift, think about the recipient’s favorite colors.
Soft, timeless shades that look elegant with neutral winter outfits.
Rich colors that add warmth and a beautiful seasonal touch.
A cozy, versatile shade that pairs well with beige and camel clothing.
A lovely winter-inspired color for a classic handmade accessory.
A gentle shade for a soft, feminine crochet design.
A practical neutral color that works with many everyday looks.
Common Crochet Cowl Mistakes and How to Fix Them
Even a beginner-friendly pattern can sometimes be tricky. You might notice uneven edges, missed stitches, or a fabric that does not match the measurements you expected. These are common problems, and most of them are easy to correct.
1. Your Foundation Chain Is Too Tight
A tight foundation chain can cause the lower edge of your cowl to pull inward. This can make the fabric look narrower at the bottom.
How to fix it: Try making your chain stitches more relaxed. You can also use a slightly larger hook for the foundation chain and switch back to your regular hook for the remaining rows.
2. Your Edges Are Becoming Uneven
If your cowl becomes wider or narrower as you work, you may be accidentally adding or skipping stitches at the beginning or end of a row.
How to fix it: Count your stitches at the end of each row. Pay special attention to the first and last stitches, as these are common places where beginners make mistakes.
3. Your Crochet Fabric Feels Too Stiff
If the fabric feels stiff and does not bend comfortably, your hook may be too small for the yarn or your tension may be too tight.
How to fix it: Try a larger hook and make another gauge swatch. Choose a softer yarn if the original material feels uncomfortable.
4. Your Cowl Is Too Small
If your finished cowl feels tight around your neck, the circumference may be too short. This can happen when your gauge is smaller than expected or the foundation chain is shorter than required.
How to fix it: Measure your foundation chain before working the rows. For your next project, add more chain stitches until you reach the desired measurement.
5. Your Seam Looks Bulky
A thick or uneven seam can affect the appearance and comfort of your finished accessory. Pulling the joining yarn too tightly can also cause the edges to bunch together.
How to fix it: Join the edges with consistent tension. A mattress stitch with a yarn needle can create a neat and relatively flat seam.
6. You Run Out of Yarn
Using more yarn than expected can happen if your stitches are tight, your cowl is larger, or your yarn is thicker than the sample material.
How to fix it: Buy enough yarn before beginning. If you are using a different yarn weight or changing the measurements, make a swatch and estimate your yarn needs before starting the full project.
How to Style Your Crochet Cowl
After finishing your project, you can enjoy wearing it with different winter outfits. A handmade cowl is a versatile accessory that can add texture, warmth, and personality to simple clothing.
Wear It with a Winter Coat
Pair your cowl with a long wool coat for a classic cold-weather look. A cream or beige cowl looks especially beautiful with camel, gray, or brown outerwear. Choose a shade that complements your coat rather than competing with it.
Style It with a Sweater
A crochet cowl looks lovely with a simple knitted or fleece sweater. You can wear it loosely around your neck for a relaxed appearance or fold it slightly for a more structured shape.
Pair It with a Casual Outfit
For everyday wear, combine your cowl with jeans, a basic long-sleeve top, and a warm jacket. A textured handmade accessory can make a simple outfit feel more interesting without requiring many additional pieces.
Create a Coordinated Winter Gift
If you enjoy making handmade accessories, you can create a matching set with a crochet headband, fingerless gloves, or a beanie. Choose the same yarn color for a coordinated appearance.
How to Wash and Care for Your Crochet Cowl
Taking proper care of your finished project helps maintain its shape, softness, and appearance. The best washing method depends on the fiber used in your yarn, so always check the yarn label first.
Check the Yarn Care Label
Different yarn fibers have different care requirements. Some acrylic yarns can be machine washed, while many wool yarns need gentle hand washing. Follow the manufacturer’s instructions rather than assuming every yarn can be treated the same way.
Use Gentle Washing Methods
If hand washing is recommended, use cool or lukewarm water and a suitable gentle detergent. Avoid rubbing or twisting the crochet fabric because this may stretch the stitches or change the shape.
Dry It Carefully
After washing, gently remove excess water without wringing the cowl. Place it flat on a clean towel or drying surface and reshape it to its original measurements. Allow it to dry completely before storing or wearing it.
Store It Properly
Keep your crochet cowl in a clean, dry place. Folding it neatly and storing it away from moisture can help protect the yarn. Avoid hanging heavy crochet pieces for long periods if the yarn is likely to stretch.
How to Make This Crochet Cowl as a Handmade Gift
A handmade cowl can be a thoughtful gift for someone who appreciates cozy accessories. Because the design is simple and customizable, you can make it in a color that suits the recipient’s personal style.
For a classic gift, choose cream, gray, or beige yarn. For someone who enjoys richer colors, burgundy, plum, and forest green are beautiful choices.
You can also add a small handmade gift tag with the yarn material and washing instructions. Fold the finished cowl neatly and place it in a simple gift box or fabric bag.
Handmade gifts are special because they show the time and effort you put into creating something for another person. Even a simple crochet design can become meaningful when it is made with care.
Ways to Improve Your Crochet Skills with This Project
This project is not only about making a warm winter accessory. It is also a useful way to practice the basic skills that you will need for future crochet patterns.
Practice Consistent Tension
Try to maintain a similar amount of tension as you work through each row. Consistent tension helps your fabric look smooth and makes it easier to reach the intended measurements.
Learn to Read Pattern Abbreviations
Understanding abbreviations such as ch, hdc, and sl st will make many future crochet patterns easier to follow. Keep the abbreviation table nearby while working until the terms become familiar.
Get Comfortable with Measuring
Measuring your work is an important crochet skill. It helps you create wearable accessories that fit properly and reduces the chance of finishing a project that is too small or too large.
Experiment with Different Textures
After completing this cowl, you can practice other basic stitches on small samples. Try single crochet, double crochet, and other beginner-friendly techniques to discover which textures you enjoy most.
Easy Crochet Cowl Pattern: Quick Reference Checklist
Use this checklist to make sure you have everything ready before starting your project. It is also useful to keep nearby while crocheting.
Your Crochet Project Checklist
- Medium-weight worsted yarn, approximately 180–220 yards.
- 6.0 mm crochet hook or a size that matches your gauge.
- Yarn needle for joining and finishing.
- Scissors for trimming yarn.
- Measuring tape for checking finished dimensions.
- Slip knot and foundation chain completed.
- Half double crochet stitches practiced.
- Foundation chain measured for the desired circumference.
- Rows completed to the desired height.
- Short edges joined neatly.
- Loose yarn ends woven in.
- Finished cowl checked for size and comfort.
Frequently Asked Questions About Crochet Cowls
1. Is this easy crochet cowl pattern good for beginners?
Yes. This design uses basic crochet techniques, mainly chain stitches and half double crochet stitches. Beginners who understand how to hold a hook and work basic stitches can follow the instructions at their own pace. Practicing a small swatch first can make the process easier.
2. How much yarn do I need for a crochet cowl?
For this sample design, you will need approximately 180–220 yards of medium-weight worsted yarn. The exact quantity depends on your stitch tension, yarn thickness, and finished dimensions. A larger or taller cowl may require additional yarn.
3. What crochet hook size should I use?
A 6.0 mm crochet hook is the starting size for this pattern. However, the correct hook depends on your yarn and personal tension. Make a gauge swatch and adjust the hook size if your stitches are too tight or too loose.
4. How long does it take to crochet a cowl?
The time depends on your experience, crochet speed, and the yarn you choose. An experienced crocheter may finish a simple cowl in a few hours, while a beginner may need longer. You can work on a few rows at a time rather than completing the project in one sitting.
5. Can I make this crochet cowl without a sewing machine?
Yes. You do not need a sewing machine. The two short edges can be joined by hand using a yarn needle and a suitable sewing stitch. You can also use slip stitches to connect the edges with your crochet hook.
6. Can I use bulky yarn instead of worsted-weight yarn?
Yes, but bulky yarn will create a thicker and potentially heavier cowl. You will need to make a new gauge swatch and adjust your foundation chain and row count. The yarn quantity may also change.
7. How do I make my crochet cowl wider?
To make the cowl wider around the neck, increase the number of foundation chains. The starting chain determines the circumference in this pattern. Measure your chain before working the rows to make sure you reach the desired size.
8. How can I make my cowl taller?
Simply work additional half double crochet rows until the fabric reaches your preferred height. Measure the fabric as you go instead of relying only on a fixed number of rows.
9. Can I use cotton yarn for this project?
Yes. Cotton yarn can be used, especially if you prefer a lighter accessory. However, cotton may produce a different drape and feel compared with wool or acrylic yarn. Always make a gauge swatch before starting.
10. Why does my crochet cowl look uneven?
Uneven edges often happen when stitches are accidentally added or skipped at the beginning or end of rows. Count your stitches regularly and make sure you work into the correct first and last stitches. Consistent tension also helps create a neat fabric.
11. Can I make this pattern in multiple colors?
Yes. You can change yarn colors after completing a row to create stripes or a color-block effect. Secure the old and new yarn ends neatly, and weave them into the fabric when finishing.
12. Is a crochet cowl warmer than a regular scarf?
Warmth depends on the yarn, stitch density, and design. A cowl can provide good neck coverage without loose ends, while a scarf offers more flexibility in how you wrap it. A thick yarn and a comfortable fabric can make either accessory warm.
13. How do I keep my crochet cowl from stretching?
Choose a yarn with suitable structure, avoid pulling the fabric while wearing it, and follow the yarn care instructions when washing. Drying the cowl flat can also help it maintain its original shape.
14. Can I sell cowls made using this pattern?
You can make and sell your own finished handmade items, subject to applicable pattern terms and marketplace rules. If you are using a pattern from another designer, check their specific licensing terms before selling items made from it.
Final Thoughts on This Easy Crochet Cowl Pattern
Making a handmade winter accessory can be a relaxing and rewarding experience. This Easy Crochet Cowl Pattern gives you a simple way to create something useful while practicing basic crochet skills. With a few materials, a suitable hook, and some patience, you can make a cozy accessory that fits your personal style.
The simple rectangular construction makes this project approachable for beginners. You start with a foundation chain, work half double crochet rows until you reach your preferred height, and join the short edges to form a comfortable loop. You can keep the design simple or experiment with different yarn colors, textures, and sizes.
If you are making your first cowl, remember that neatness and comfort matter more than speed. Take time to check your gauge, count your stitches, and measure your work as you go. Small adjustments can make a big difference in the finished result.
Once you have completed your first project, you may feel inspired to try more handmade accessories. A matching headband, fingerless gloves, or winter beanie can be wonderful next projects.
Gather your favorite yarn, choose a comfortable crochet hook, and enjoy creating your own cozy cowl. Whether you make it for yourself or as a handmade gift, this simple project is a lovely way to bring a little creativity into the colder months.
