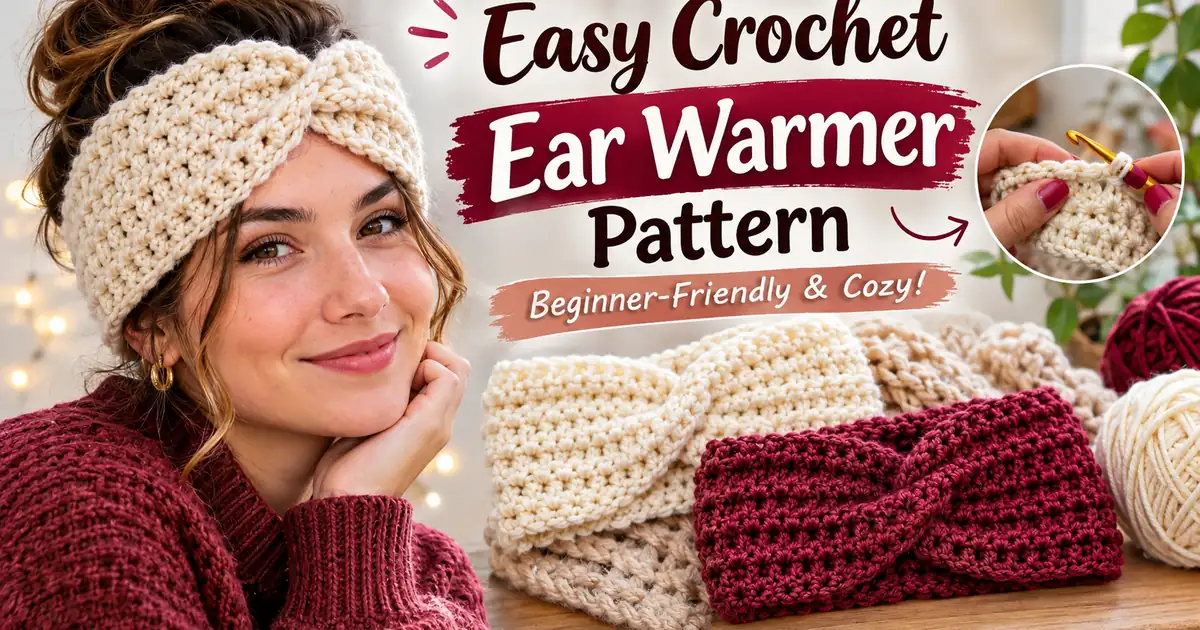
What if you could turn a small ball of yarn into a beautiful winter accessory that looks like something from a boutique? This Easy Crochet Ear Warmer Pattern makes it possible, even if you are still learning to crochet! With its soft ribbed texture and pretty twisted front, this handmade ear warmer is both practical and stylish. It keeps your ears cozy on chilly mornings while adding a lovely touch to your winter outfits. The best part? You only need a few basic supplies and simple crochet stitches to create it. Follow this beginner-friendly tutorial to learn how to choose your yarn, measure the perfect fit, crochet the band, and create that beautiful finished twist.
- Which yarn and crochet hook to choose.
- How to measure your head for a comfortable fit.
- How to crochet a stretchy ribbed band.
- How to join the ends and create an optional twist.
What Is a Crochet Ear Warmer?
A crochet ear warmer is a handmade headband designed to cover your ears and keep them warm during cold weather. Unlike a traditional winter hat, it leaves the top of your head open while providing warmth around the forehead and ears.
It is a practical accessory for people who enjoy outdoor walks, morning errands, winter activities, or simply want an extra layer of warmth without wearing a full beanie. Crochet ear warmers are also popular because they use less yarn than many larger winter accessories.
This design features a ribbed texture that gives the band a stretchy feel. The optional twisted front creates a beautiful gathered detail that makes a simple crochet headband look more interesting.
- It is a small and manageable crochet project.
- It uses basic stitches that beginners can practice.
- It requires a relatively small amount of yarn.
- It can be customized for children, teens, and adults.
- It makes a lovely handmade winter gift.
Is This Easy Crochet Ear Warmer Pattern Suitable for Beginners?
Yes! This pattern is designed for crocheters who know a few basic techniques and want to make their first wearable accessory. You do not need complicated shaping, advanced stitch combinations, or a large collection of supplies.
The main construction is a simple rectangle. You will crochet rows until the band reaches the required length, join the two short ends, and optionally arrange the center to create a twist.
The ribbed texture is created by working half double crochet stitches into the back loop only. This technique creates raised lines and gives the finished fabric more flexibility.
Basic Skills You Will Need
- Slip knot: The starting loop placed on your crochet hook.
- Chain stitch: Used to create the foundation chain.
- Half double crochet: A basic stitch used throughout this design.
- Back loop only: Working into the back loop of a stitch to create ribbing.
- Slip stitch: Used for joining and finishing.
- Weaving in ends: Hiding loose yarn tails with a yarn needle.
Materials Needed for the Easy Crochet Ear Warmer Pattern
One of the best things about this project is that you do not need many materials. You can make a beautiful ear warmer with one ball of suitable yarn and a few basic crochet tools.
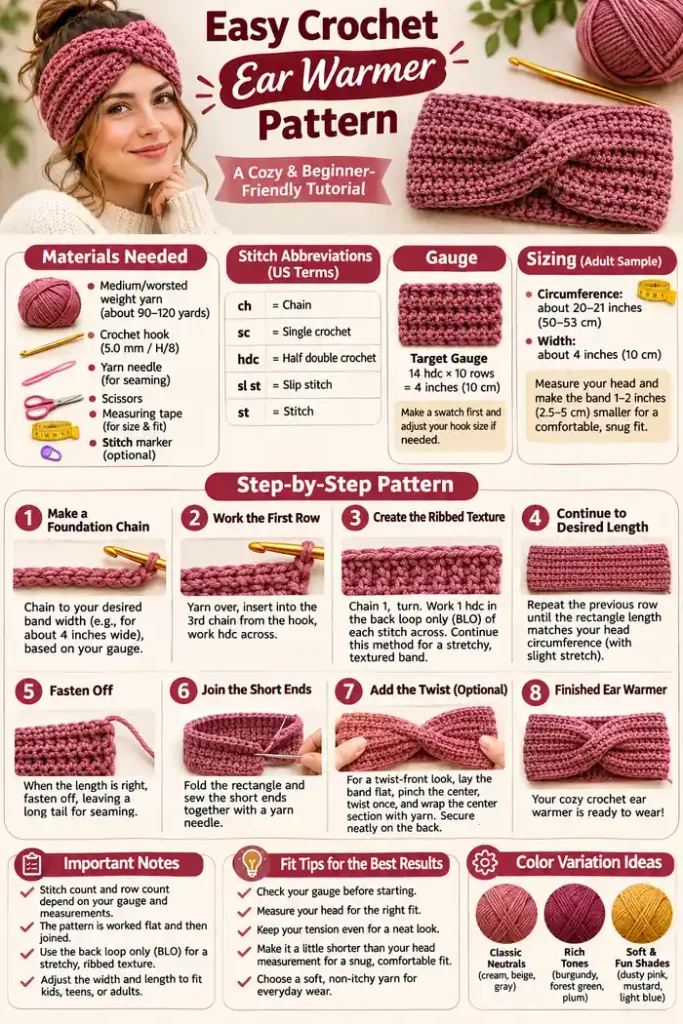
Approximately 90–120 yards of medium-weight category 4 yarn for the sample adult design.
A 5.0 mm crochet hook (US H/8) is a starting point for the sample pattern.
Used for sewing the short ends together and hiding loose yarn tails.
A small pair of scissors for cutting yarn after completing the project.
Helpful for measuring your head and checking the finished band length.
Optional, but useful for marking the beginning of rows or important stitches.
1. Choosing the Right Yarn
Yarn choice affects the softness, stretch, thickness, and warmth of your ear warmer. Since this accessory sits directly against your forehead and ears, comfort should be your first priority.
Medium-weight worsted yarn is a good choice for this sample pattern. It creates a fabric that is thick enough for chilly weather while remaining flexible and comfortable.
Popular Yarn Choices
- Acrylic yarn: Affordable, widely available, and offered in many beautiful colors.
- Merino wool: Soft, warm, and suitable for a cozy winter accessory.
- Wool blends: Combine warmth with different levels of softness and durability.
- Soft acrylic blends: A practical choice for beginners who want an easy-care material.
Look for yarn that feels gentle against your skin. Some wool yarns may feel itchy to sensitive skin, so test a small sample before making the full band.
2. Selecting the Crochet Hook
This sample uses a 5.0 mm crochet hook. However, your ideal hook size depends on your yarn and crochet tension.
If your fabric feels stiff, try a slightly larger hook. If the stitches look too loose and the band does not hold its shape, a smaller hook may help. Make a gauge swatch before beginning the full project.
3. Other Helpful Supplies
A yarn needle is important for creating a neat seam. Measuring tape helps you determine the correct headband length, and scissors are useful for trimming the yarn after fastening off.
Finished Size and Gauge
A comfortable ear warmer should cover both ears without feeling too tight or slipping down. Because everyone’s head size and crochet tension are different, measuring your work is more reliable than following a fixed stitch count alone.
Sample Adult Measurements
- Finished circumference: Approximately 20–21 inches.
- Band width: Approximately 4 inches.
- Construction: Worked flat in rows.
- Texture: Half double crochet back-loop ribbing.
- Front detail: Optional twist.
- Skill level: Beginner.
Understanding the Gauge
The sample target gauge is approximately 14 half double crochet stitches and 10 rows in a 4-inch square using the selected yarn and hook.
- 14 half double crochet stitches = 4 inches.
- 10 rows = 4 inches.
- Approximately 3.5 stitches per inch.
- Approximately 2.5 rows per inch.
How to Make a Gauge Swatch
- Choose your yarn and crochet hook.
- Make a foundation chain with enough stitches for a sample wider than 4 inches.
- Work half double crochet stitches in rows.
- For a more accurate sample, use the same back-loop technique as the main pattern.
- Continue until the sample is taller than 4 inches.
- Lay the fabric flat without stretching it.
- Measure the center 4 inches and count the stitches and rows.
If you have more stitches than the target gauge, your fabric is probably too tight. Try a larger hook. If you have fewer stitches, your fabric may be too loose, so try a smaller hook.
How to Measure Your Head for a Crochet Ear Warmer
Before starting the main project, measure your head so the ear warmer fits comfortably. A band that is too loose may slide down, while one that is too tight can feel uncomfortable around the forehead.
Step 1: Measure Your Head Circumference
Place a flexible measuring tape around your head, passing it across your forehead and around the widest part at the back. Keep the tape at the position where you want the ear warmer to sit.
Step 2: Decide on the Fit
A crochet ear warmer usually needs some negative ease. This means the finished band is slightly shorter than your head measurement so the fabric stretches gently and stays in place.
For the sample adult design, a head circumference of approximately 21–22 inches may work with a finished band around 20–21 inches, depending on the yarn and fabric stretch.
Step 3: Check the Band Width
The sample band is approximately 4 inches wide. You can increase or decrease this measurement depending on how much coverage you prefer.
- Measure the head where the band will sit.
- Make a small swatch to test the stretch.
- Start with a finished length around 1–2 inches shorter than the head measurement as a sample guide.
- Adjust according to your yarn and personal comfort.
Abbreviations Used in This Crochet Pattern
This tutorial uses standard US crochet terminology. Keep this table nearby while working through the instructions.
| Abbreviation | Meaning | Description |
|---|---|---|
| ch | Chain | Make a chain stitch. |
| hdc | Half Double Crochet | Work a half double crochet stitch. |
| sc | Single Crochet | Work a single crochet stitch. |
| sl st | Slip Stitch | Join or move through stitches. |
| st | Stitch | Refers to one stitch. |
| sts | Stitches | Refers to multiple stitches. |
| BLO | Back Loop Only | Work into the back loop only. |
| yo | Yarn Over | Wrap yarn around the hook. |
| rep | Repeat | Work the same instructions again. |
Easy Crochet Ear Warmer Pattern: Step-by-Step Instructions
Now that you have your materials and measurements ready, it is time to begin. This design is made as a simple rectangle, which is then joined at the short ends. The back-loop stitches create a stretchy ribbed texture that looks beautiful on the finished band.
Quick Pattern Overview
- Yarn: Medium-weight worsted yarn.
- Yarn quantity: Approximately 90–120 yards.
- Hook: 5.0 mm (H/8), adjusted for gauge.
- Finished circumference: Approximately 20–21 inches.
- Width: Approximately 4 inches.
- Main stitch: Half double crochet.
- Texture: Back-loop-only ribbing.
- Construction: Flat rectangle joined at the short edges.
- Optional detail: Twisted front.
Step 1: Make a Slip Knot
Start by creating a slip knot with your yarn. Place the loop on your crochet hook and gently tighten it until it fits comfortably around the hook.
Keep the working yarn positioned so you can move it smoothly while crocheting. Leave a short tail for weaving in later.
Create a slip knot and place it on your 5.0 mm crochet hook. Check that the loop is not too tight.
Step 2: Make the Foundation Chain
For a band approximately 4 inches wide with the sample gauge, begin with around 16 chains as a starting estimate. Your exact count may vary, so measure the foundation chain and adjust it to your preferred width.
To make each chain, yarn over and pull through the loop on your hook. Repeat until you have the required number of chains.
Try to keep the foundation chain even. If it is too tight, the bottom edge may pull inward. If it is too loose, the edge may look wavy.
Step 3: Work the First Row
Yarn over your hook and insert it into the third chain from the hook. Yarn over again and pull through the chain. You should now have three loops on your hook.
Yarn over once more and pull through all three loops. This completes one half double crochet stitch.
Continue making one half double crochet in each remaining chain across the row.
- Yarn over your hook.
- Insert the hook into the third chain from the hook.
- Yarn over and pull through the chain.
- Yarn over again and pull through all three loops.
- Repeat across the foundation chain.
Step 4: Create the Ribbed Texture
After completing the first row, chain 1 and turn your work. This turning chain does not count as a stitch in this pattern.
Work one half double crochet into the back loop only of the first stitch. Continue making one half double crochet in the back loop only of every stitch across the row.
Working into the back loop creates small raised ridges. These ridges give the fabric its stretchy ribbed appearance.
- Chain 1 and turn your work.
- Look at the top of the first stitch.
- Identify the two loops forming the top V.
- Insert your hook into the back loop only.
- Complete one half double crochet stitch.
- Repeat in the back loop of each stitch across.
Step 5: Continue Crocheting the Rows
Repeat the same process for each row. Chain 1, turn your work, and make one half double crochet in the back loop only of every stitch across.
Keep working until your rectangle reaches the length needed for your head measurement. With the sample gauge, a finished length of approximately 20–21 inches may require around 50–53 rows.
However, do not depend only on row count. Different crocheters create different stitch heights, so measuring the actual fabric is more reliable.
- Keep the number of stitches consistent in every row.
- Measure the width of the band.
- Check the length as you work.
- Keep the ribbed rows even.
- Test the stretch before finishing.
Step 6: Fasten Off
When your rectangle reaches the desired length, complete the final row. Cut the yarn, leaving a tail long enough for joining the short edges.
Pull the yarn through the final loop and gently tighten it. Avoid pulling too tightly because you will need enough yarn to sew the seam.
Check the width and length one last time. Your rectangle should be long enough to fit around your head with a little stretch and wide enough to cover your ears comfortably.
Step 7: Join the Short Edges
Lay the rectangle flat and bring the two short edges together. Make sure the band is not twisted unless you are deliberately creating a twist-front design.
Thread the yarn tail through a yarn needle and sew the two edges together using a mattress stitch or another neat joining method. Try to match the stitches along both edges so the seam looks even.
Once the seam is secure, weave in the remaining yarn ends.
Step 8: Create the Optional Twisted Front
If you want a twisted ear warmer, arrange the center of the band before completing the final join. A twist creates a gathered detail at the front and gives the accessory a more decorative appearance.
For a simple twist-front finish, lay the rectangle flat with the short ends positioned for joining. Fold the ends so they overlap in opposite directions, creating a gentle S-shaped arrangement at the center. Adjust the layers until the front looks like a neat twist, then sew through all the layers securely.
Take your time with this step. The center should be secure without becoming too bulky or uncomfortable against your forehead.
- Lay your finished rectangle flat.
- Bring the short ends toward each other.
- Arrange the ends in opposite directions to create a folded center.
- Check that the twist is positioned in the middle.
- Sew through the folded layers securely.
- Weave in the yarn ends and check the front detail.
Step 9: Try On Your Finished Ear Warmer
Place the ear warmer around your head and check that it covers both ears. The band should feel snug but not tight. It should stay in position without pressing uncomfortably against your forehead.
If the band feels too tight, you may need a longer rectangle for your next project. If it slips down, check whether the fabric is too loose or whether the finished length is too long.
You now have a handmade winter accessory with a beautiful ribbed texture. Wear it with your favorite cold-weather outfits or make another one in a different color.
How to Customize Your Crochet Ear Warmer
Once you understand the basic construction, you can easily adjust this pattern to create different styles. Small changes in width, length, yarn, and color can completely change the appearance of the finished accessory.
1. Make a Wider Ear Warmer
If you want more coverage around your ears, increase the number of foundation chains. A wider band can also be folded slightly for an extra layered look.
Remember that adding more chains increases the width, not the circumference. Measure the foundation chain before working the rows.
2. Make a Narrower Ear Warmer
For a simple, lightweight headband, reduce the number of foundation chains. A narrower band can be a good option for milder weather or for people who prefer minimal accessories.
3. Adjust the Length
The number of rows determines the length of the rectangle. Work fewer rows for a smaller head size or add more rows for a larger head circumference.
Always account for the stretch of your yarn. A stretchy ribbed band should usually be slightly shorter than the head measurement so it stays comfortably in place.
4. Try a Different Stitch Texture
The back-loop-only half double crochet stitch creates a simple ribbed appearance. You can experiment with other beginner-friendly stitches to create a different fabric texture.
- Single crochet ribbing: Creates a dense, compact fabric.
- Half double crochet ribbing: Offers a soft balance of texture and flexibility.
- Double crochet fabric: Creates a taller stitch and a lighter appearance.
If you change the main stitch, make a new gauge swatch and adjust the measurements before beginning.
5. Add a Decorative Border
You can add a simple single crochet border along the long edges if you want a more finished appearance. Work evenly around the edge without pulling the stitches too tightly.
Best Yarn Colors for a Handmade Ear Warmer
Color is one of the easiest ways to make your handmade accessory feel personal. Neutral shades are useful for everyday outfits, while rich colors can create a beautiful seasonal look.
Soft neutral shades that pair beautifully with beige, gray, and brown winter clothing.
Rich seasonal colors that create a warm and eye-catching accessory.
A versatile shade that looks lovely with camel, cream, and denim outfits.
A classic winter color that adds a natural seasonal touch.
A soft color for a gentle and feminine handmade look.
A cheerful shade that adds a little brightness to neutral winter outfits.
Common Crochet Ear Warmer Mistakes and How to Fix Them
Even a simple crochet project can present a few challenges. Uneven rows, incorrect measurements, and bulky seams are common problems, especially when you are learning. Fortunately, most of these issues can be corrected with a little patience.
1. Your Ear Warmer Is Too Tight
If the band feels uncomfortable or leaves pressure marks, the finished length may be too short. Your crochet tension may also be tighter than the sample gauge.
How to fix it: Make a gauge swatch and measure your head before starting. Increase the rectangle length slightly if necessary.
2. Your Ear Warmer Keeps Slipping
A band that moves around may be too long or may not have enough stretch to stay in position.
How to fix it: Adjust the finished length according to your head measurement. Use a yarn and stitch combination that provides suitable elasticity.
3. Your Ribbed Texture Looks Uneven
This can happen if you accidentally work into both loops instead of the back loop only. Inconsistent tension can also affect the appearance.
How to fix it: Check the top of each stitch before inserting your hook. Make sure you consistently work into the back loop only.
4. Your Edges Are Becoming Uneven
If your band becomes wider or narrower, you may be accidentally adding or skipping stitches at the ends of rows.
How to fix it: Count your stitches regularly and use a stitch marker if you have difficulty identifying the first or last stitch.
5. Your Seam Looks Bulky
A thick seam can make the ear warmer uncomfortable, especially if it sits directly against the forehead or back of the head.
How to fix it: Use a neat joining technique and avoid pulling the yarn too tightly. Position the seam carefully so it does not create an uncomfortable pressure point.
6. The Twist Looks Too Thick
If the front detail looks bulky, too many layers may be overlapping in the center.
How to fix it: Arrange the folds more carefully and secure only the necessary layers. Check the comfort of the center before completing the seam.
How to Style Your Crochet Ear Warmer
A handmade ear warmer can become a beautiful part of your winter wardrobe. It is easy to wear with casual clothing, cozy layers, and outdoor outfits.
1. Pair It with a Chunky Sweater
Wear your ear warmer with a soft oversized sweater and jeans for a relaxed cold-weather outfit. A cream or beige headband looks especially lovely with burgundy, brown, or gray knitwear.
2. Wear It with a Winter Coat
A crochet ear warmer can be a practical alternative to a full winter hat when you want to keep your ears warm without covering your hairstyle. Pair it with a wool coat and a simple scarf for a coordinated look.
3. Style It with a Casual Jacket
For everyday errands or outdoor walks, combine your handmade headband with a puffer jacket, leggings, and comfortable boots. Choose a color that complements your outerwear.
4. Create a Matching Winter Set
If you enjoy making crochet accessories, create a matching set with fingerless gloves, a cowl, or a beanie. Using the same yarn shade makes the pieces look coordinated and thoughtful.
How to Make a Crochet Ear Warmer as a Handmade Gift
A crochet ear warmer is a lovely handmade gift because it is useful, personal, and relatively quick to make. You can create one in the recipient’s favorite color or choose a neutral shade that is easy to wear.
For a simple gift, use cream, gray, or beige yarn. If the recipient prefers brighter colors, dusty pink, burgundy, mustard, and forest green can be beautiful options.
You can also make different sizes for family members. Just remember to measure the intended wearer’s head or use a suitable size guide before starting.
Finish the accessory neatly, weave in all yarn ends, and include a small care note with the gift. A simple fabric bag or gift box can make the handmade item feel even more special.
How to Wash and Care for Your Crochet Ear Warmer
Proper care helps your finished ear warmer maintain its shape, softness, and appearance. Because different yarn fibers have different washing requirements, always check the manufacturer’s care instructions.
Check the Yarn Label
Some acrylic yarns can be machine washed, while wool yarns may require gentle hand washing. Do not assume that every yarn can be washed in the same way.
Wash Gently
If hand washing is recommended, use cool or lukewarm water and a gentle detergent. Avoid rubbing or twisting the fabric because this may stretch the stitches or damage the ribbed texture.
Dry Flat
After washing, gently remove excess water without wringing the ear warmer. Place it flat on a clean towel and reshape it carefully. Allow it to dry completely before wearing or storing it.
Store It Carefully
Keep your crochet accessory in a clean, dry place. Folding it neatly can help it maintain its shape. Avoid hanging it for long periods if the yarn is likely to stretch.
Quick Crochet Ear Warmer Pattern Checklist
Use this checklist before starting and again when finishing your project. It can help you avoid missing an important step.
Your Project Checklist
- Medium-weight yarn selected.
- 5.0 mm crochet hook ready.
- Yarn needle and scissors prepared.
- Head circumference measured.
- Gauge swatch completed.
- Foundation chain made to the desired width.
- First half double crochet row completed.
- Back-loop-only ribbed rows completed.
- Rectangle measured for the correct length.
- Short edges joined neatly.
- Optional twist securely sewn.
- Loose yarn ends woven in.
- Finished ear warmer checked for comfort.
Frequently Asked Questions About Crochet Ear Warmers
1. Is this easy crochet ear warmer pattern suitable for beginners?
Yes. This design uses basic chain and half double crochet stitches. Beginners who understand the basic crochet movements can follow the instructions. The back-loop technique may take a little practice, but it is easy to learn with a small sample.
2. How much yarn do I need for a crochet ear warmer?
For this sample adult design, approximately 90–120 yards of medium-weight yarn should be a useful starting estimate. The actual amount depends on the width, length, yarn thickness, and stitch tension.
3. What crochet hook size should I use?
A 5.0 mm crochet hook is the starting size for this pattern. However, you may need a different hook size depending on your yarn and gauge. Always make a swatch before starting the full project.
4. How long does it take to crochet an ear warmer?
The time depends on your experience and crochet speed. Because this is a small project, many experienced crocheters can complete it in a few hours. Beginners may need more time to practice the stitches and finish the seam.
5. Can I make this ear warmer without the twist?
Yes. The twist is optional. You can simply join the two short ends of the rectangle to make a basic ribbed crochet headband. It will still be warm, comfortable, and attractive.
6. How do I make my crochet ear warmer fit tighter?
Reduce the finished band length slightly compared with your head measurement. However, do not make it excessively short. Test the stretch with a sample so the band stays in place without feeling uncomfortable.
7. Can I use bulky yarn for this pattern?
Yes. Bulky yarn can create a thicker winter ear warmer. You will need to make a new gauge swatch and adjust the foundation chain and row count. The finished band may also use more or less yarn depending on its size.
8. Can I make this crochet ear warmer for children?
Yes. You can adapt the pattern for children by measuring the child’s head and adjusting the finished length. Always make sure the band is comfortable and not too tight.
9. Why is my crochet ear warmer too loose?
Your rectangle may be too long, or your stitches may have less elasticity than expected. Check the head measurement and gauge. Adjust the finished length for your next project.
10. Why does my ribbed texture look different on each side?
Back-loop-only crochet creates ridges that can look different depending on which side of the fabric is facing you. This is normal. Keep the stitch technique consistent throughout the project.
11. Can I make this pattern in multiple colors?
Yes. You can change yarn colors after completing a row to create stripes or a color-block design. Secure and weave in the yarn ends neatly to keep the finished band clean.
12. How wide should a crochet ear warmer be?
The sample design is approximately 4 inches wide. You can make it narrower or wider depending on how much ear and forehead coverage you prefer.
13. How do I make the twisted front look neat?
Arrange the short ends in opposite directions to create the folded center. Adjust the layers before sewing and secure them firmly with a yarn needle. Avoid creating too many overlapping layers because they can make the center bulky.
14. Can I sell finished ear warmers made with this pattern?
You can make and sell your own finished handmade accessories, subject to applicable pattern terms and marketplace rules. If you are using a pattern created by another designer, check their licensing conditions before selling items made from it.
Final Thoughts on This Easy Crochet Ear Warmer Pattern
Making your own winter accessories can be a relaxing and rewarding experience. This Easy Crochet Ear Warmer Pattern gives you a simple way to create something practical while practicing basic crochet skills.
The ribbed texture makes the band look beautiful, while the optional twisted front adds a decorative detail. You can keep the design simple or experiment with different yarn colors, widths, and sizes to create an accessory that matches your personal style.
If this is your first wearable crochet project, take your time with the measurements and gauge. Check your stitch count as you work, and make sure the finished band feels comfortable before completing the final seam.
Once you finish your first ear warmer, you may want to make another one in a different color or create a matching winter accessory set. A simple handmade project can be the beginning of many more creative crochet ideas.
Gather your favorite yarn, prepare your crochet hook, and enjoy making a beautiful handmade accessory for the colder months. A little yarn and a few simple stitches are all you need to get started!