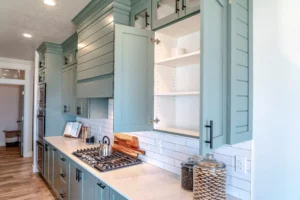
If you want to stain your kitchen cabinets without breaking the bank, you’re in the right spot. Staining is an affordable and satisfying DIY project that can refresh your kitchen.
Rather than replacing old cabinets, you can highlight the wood grain, pick your favorite color, and give your kitchen a fresh, modern feel.
This guide walks you through each step, from preparation and sanding to selecting the right stain and applying a strong finish.
Table of Contents
Why Learn How to Stain Kitchen Cabinets
Staining your kitchen cabinets can save you thousands compared to a full remodel and still make your kitchen look new.
Unlike paint, stain lets the natural wood grain show through, adding warmth and character. You can also pick from light stains to brighten up small spaces or go with dark shades like walnut or espresso for a bold look.
Tools & Materials Needed for Cabinet Staining
Before you start, gather the right tools to make the process smooth and frustration-free:
- Sandpaper (medium and fine grit)
- Tack cloth or microfiber cloth
- Wood filler for cracks and imperfections
- Oil-based or water-based stain (depending on your preference)
- Gel stain or penetrating stain for specific finishes
- Brushes, foam applicators, or clean rags
- Wood conditioner (for blotch-prone woods like maple or pine)
- Polyurethane, top coat, or protective sealant
Having these materials ready ensures your stain penetrates evenly and your finish resists grease, moisture, and daily wear.

Step 1: Prepping Cabinets for Stain
Preparation is key. First, take off the cabinet doors, hinges, and hardware. Clean all surfaces with a degreaser or a TSP substitute to remove any oils or residue.
If your cabinets are older, remove any old paint or varnish before moving on. Fill any cracks or dents with wood filler and sand them smooth. This step prevents uneven staining and helps the wood grain look consistent.
Step 2: Sanding Techniques for Smooth Results
Sanding is a crucial step for a great finish. Start with medium-grit sandpaper to take off the old finish, then use fine-grit sandpaper to smooth things out.
Always sand in the same direction as the wood grain to prevent scratches.
Tip: Maple and birch cabinets often absorb stain unevenly. Applying a wood conditioner before staining helps prevent blotches and discoloration.
Step 3: How to Stain Kitchen Cabinets Like a Pro
Now it’s time to stain. Use a brush, foam applicator, or clean rag to apply a thin coat of stain, following the direction of the wood grain. Wipe away any extra stain with a lint-free cloth to keep the finish smooth.
- Gel stain works great for vertical surfaces and laminate cabinets.
- Oil-based stain offers rich, deep color but takes longer to dry.
- Water-based stain dries quickly, has low VOCs, and is eco-friendly.
Allow drying time between coats for even coverage.
Step 4: Applying a Protective Finish
Once you’ve finished staining, add a clear top coat to protect your cabinets. Polyurethane is a popular option since it helps guard against scratches, grease, and moisture.
In kitchens, satin or semi-gloss finishes are a good choice because they’re tough and easy to wipe clean. Skipping this step could leave your cabinets more likely to get damaged later.
Choosing the Right Stain Color for Your Kitchen
Your stain color can make your kitchen feel brighter, cozier, or more elegant. Some popular 2025 kitchen cabinet stain color trends include:
- Light oak and natural pine can help make small kitchens feel brighter.
- Dark walnut and espresso add warmth and a dramatic touch.
- Weathered gray stains work well for rustic and farmhouse styles.
- Golden maple tones offer a timeless, traditional look.
Always test your stain on an inconspicuous area before applying it everywhere.
Oil vs Water-Based Stain: Which is Best?
One of the most common questions is whether to use oil-based or water-based stain.
- Oil-based stain: Long drying time, richer tones, penetrates deep.
- Water-based stain: Quick-drying, low-odor, eco-friendly, and easy to clean.
- Gel stain: Thick consistency, ideal for vertical surfaces, with less drippy application.
For high-traffic kitchens, many DIYers prefer oil-based stains for durability, but if you want a faster, eco-friendly option, water-based stains are ideal.
Common Mistakes to Avoid When Staining Cabinets
Even experienced DIYers make mistakes. Here’s what to watch out for:
- Skipping sanding or not cleaning properly
- Using the wrong grit of sandpaper
- Applying the stain too thickly, causing blotches
- Not wiping off excess stain.
- Forgetting to seal with a protective finish
Patience and attention to detail make all the difference.
How to Maintain Stained Kitchen Cabinets
Once your cabinets are stained and sealed, keep them looking fresh with simple maintenance:
- Clean with a damp cloth and mild soap, and avoid harsh chemicals.
- Dust regularly to prevent buildup
- Reapply a protective finish every few years if needed.
- Touch up scratches with a matching stain pen.
This care routine will keep your cabinets looking their best for years.
Staining Special Situations
Sometimes, homeowners ask if they can stain laminate cabinets. The truth: traditional stains won’t penetrate laminate, but gel stains are an option.
For heavily damaged or bleached cabinets, stripping the old finish before staining is often necessary.
You can also try two-tone cabinet staining, where the upper cabinets are lighter and the lower cabinets are darker for added contrast.
Conclusion
Now you know exactly how to stain kitchen cabinets step by step. From prepping and sanding to applying stain and protective finish, this project transforms your kitchen affordably and beautifully.
Whether you choose espresso for drama, golden oak for warmth, or eco-friendly low-VOC stains, staining gives you control over your kitchen’s style without breaking the bank.


